How to Fix a Leaking Faucet: Step-by-Step DIY Guide | Tricks and Tips for Life
How to Fix a Leaking Faucet: Step-by-Step DIY Guide
Learn how to fix a leaking faucet with my step-by-step DIY guide. Save money on plumber bills with these easy-to-follow faucet repair tips and tricks.
Home » Article » Diy » How To Fix A Leaking Faucet Step By Step Diy GuideHow to Fix a Leaking Faucet: Step-by-Step DIY Guide
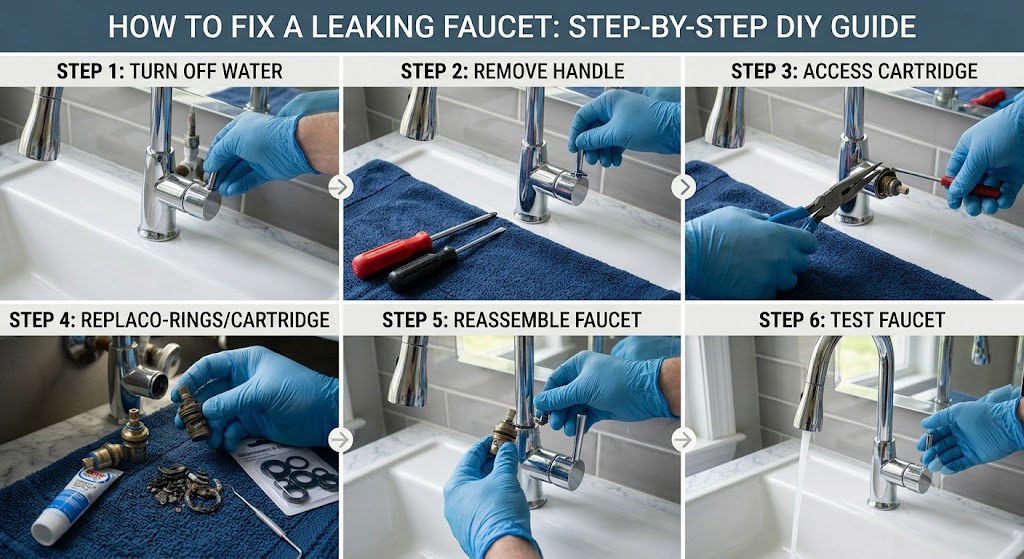
A dripping faucet is more than just an annoyance — it can waste thousands of gallons of water per year and significantly increase your water bill. The good news is that fixing a leaking faucet is one of the most achievable DIY home repairs, even for beginners. In this step-by-step guide, I'll walk you through everything you need to know to stop that drip for good.
Step 1: Gather Your Tools and Replacement Parts
To successfully repair your leaky faucet, gather the following tools: an adjustable wrench, Phillips and flathead screwdriver, needle-nose pliers, plumber's grease, a towel to wipe up water and protect the sink, and the replacement parts.
Step 2: Identify Your Faucet Type
Before you begin any repair, it is critical to know what kind of faucet you are dealing with, as each type requires a different repair approach. The four most common faucet types are: Ball Faucets (common in kitchens, have a single handle that rotates over a rounded ball-shaped cap), Cartridge Faucets (found in both single and double-handle configurations, use a cartridge to control water flow), Ceramic Disk Faucets (modern single-lever faucets with a wide cylindrical body that use ceramic discs), and Compression Faucets (the oldest type, with two separate handles that you tighten to shut off the water).
Step 3: Shut Off the Water Supply
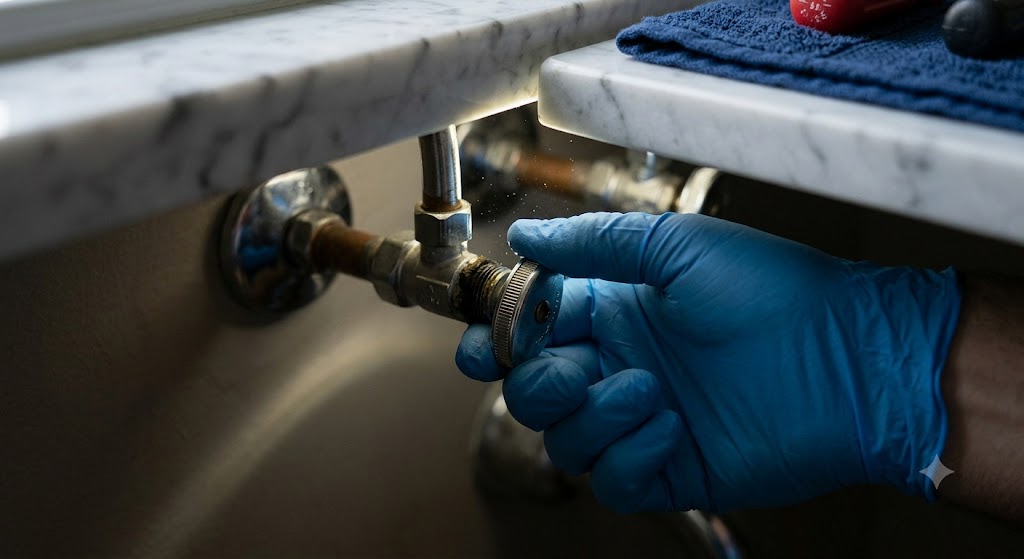
This is the most important step. Locate the shut-off valves under the sink and turn them clockwise until fully closed. If there are no individual shut-off valves, turn off the main water supply to your home. Once the water is off, turn on the faucet to release any remaining pressure and water in the line.
Advertisement
Step 4: Disassemble the Faucet Handle
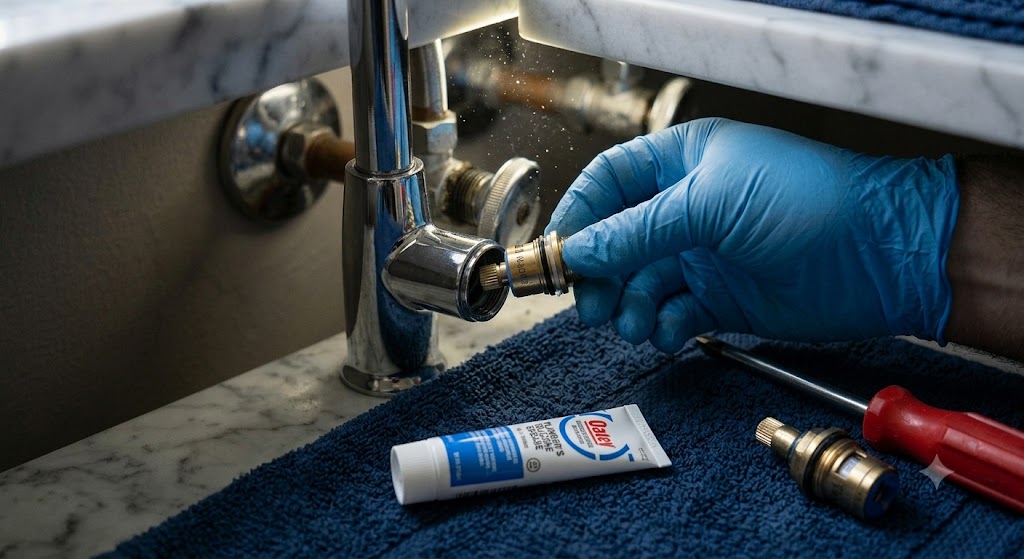
Remove the decorative cap on top of the handle (if present) using a flathead screwdriver. Underneath you will find a screw — remove it with a Phillips screwdriver and pull the handle straight off. You may need to wiggle it slightly if it is stuck. Set all small parts aside in order so you can reassemble them correctly.
Step 5: Replace the Worn Parts
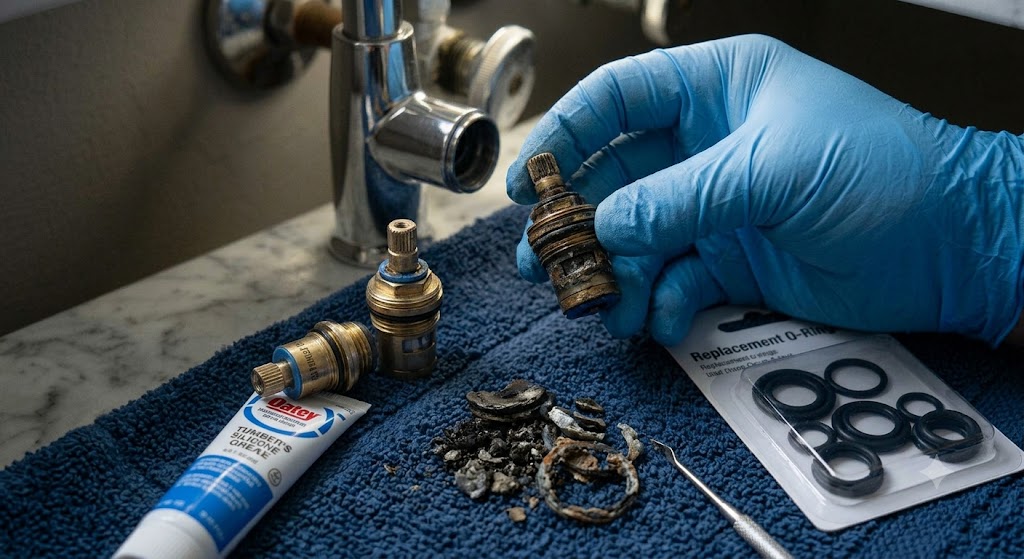
This step varies by faucet type. For compression faucets, replace the rubber washer and O-ring at the bottom of the stem — these are the most common cause of dripping. For cartridge faucets, pull out the cartridge (note its orientation) and replace it with an identical new one. For ball faucets, replace the springs, seats, and O-rings using a ball faucet repair kit. For ceramic disc faucets, remove the cylinder and replace the ceramic discs or the entire cylinder if cracked.
Before installing any new rubber parts, coat them lightly with plumber's grease to ensure a watertight seal and make future removal easier.
Step 6: Reassemble and Test
Reassemble the faucet in the reverse order you disassembled it. Make sure all parts are seated correctly and the handle screw is snug but not overtightened. Slowly turn the shut-off valves back on and check for leaks around the base and handle. Turn the faucet on and off a few times to confirm the drip is gone.
Advertisement
When to Call a Professional
While most faucet repairs are well within DIY range, there are times when calling a licensed plumber is the right call. Consider professional help if: you cannot identify the faucet type or find replacement parts, the leak is coming from the base of the faucet or from the supply lines underneath, you notice corrosion or mineral buildup that makes disassembly impossible, or the repair requires soldering copper pipes.
Money Saved by Fixing a Leaking Faucet
According to the EPA, a faucet that drips once per second wastes more than 3,000 gallons of water per year — enough to take 180 showers. At average U.S. water rates, that single dripping faucet can cost you $20 or more per year. With multiple dripping faucets, the cost adds up fast. A basic faucet repair kit typically costs $5 to $20, making this one of the highest-return DIY repairs you can make.
Disclaimer, No Liability: The authors and publishers of this website are not professional contractors and assume no liability or responsibility for any injury, damage, or financial loss resulting from the use or misuse of the information provided herein. All DIY projects are undertaken entirely at your own risk.
Related Articles
Advertisement
How to Fix a Leaking Faucet: Step-by-Step DIY Guide | Tricks and Tips for Life
Comments and Questions
Please log in to leave a comment or ask a question. Don't have an account? Register here.