How to Lay Mulch and Install Weed Barrier Fabric: Step-by-Step DIY Guide | Tricks and Tips for Life
How to Lay Mulch and Install Weed Barrier Fabric: Step-by-Step DIY Guide
Learn how to lay mulch and install weed barrier fabric with this step-by-step DIY guide. Covers planning, tools, fabric installation, and maintenance tips.
Home » Article » Diy » How To Lay Mulch And Install Weed Barrier Fabric Step By Step Diy GuideA neat layer of mulch over a properly installed weed-barrier fabric keeps beds tidy, reduces weeds, conserves moisture, and improves soil health. This guide walks you through planning, materials, and a clear, safe step-by-step process so you can finish the job efficiently and get long-lasting results.
Quick overview
- Goal: Suppress weeds, retain moisture, and improve bed appearance.
- Best time to do it: Spring or fall, when soil is workable and plants are not stressed.
- Main steps: prepare bed → install fabric (optional) → edge and anchor → lay mulch → finish and maintain.
Materials and Tools You’ll Need
Materials
- Weed barrier fabric (woven landscape fabric for durability; avoid thin plastic sheeting)
- Mulch (wood chips, shredded bark, pine needles, or composted mulch)
- Landscape staples / U-shaped pins (galvanized, 6–12 in per 10 sq ft)
- Edging material (metal, plastic, or stone) — optional but recommended
- Soil amendments (compost, slow-release fertilizer) — optional
Tools
- Gloves, knee pads
- Rake, garden fork, shovel
- Wheelbarrow or tarp for moving mulch
- Utility knife or heavy-duty scissors (for cutting fabric)
- Tape measure, string line (for straight edges)
- Broom (for cleanup)
Planning and Preparation
- Decide whether to use fabric.
- Use fabric where you want long-term weed suppression under pathways, around shrubs, or in new beds.
- Skip fabric in beds where you plan to frequently plant, dig, or where you want organic matter to mix freely into the soil (vegetable gardens, perennial beds that you’ll replant often).
- Choose the right fabric and mulch.
- Woven landscape fabric lets water and air through while blocking many weeds; it’s more durable than thin nonwoven types.
- Mulch depth: 2–4 inches for shredded bark or wood chips; 1–2 inches for fine mulches like pine needles.
- Measure the area.
- Calculate square footage to buy enough fabric and mulch. Add 10–15% extra for overlaps and settling.
Step-by-Step: Prepare the Bed
- Clear the area.
- Remove existing weeds, grass, roots, and debris. Pull or dig out persistent weeds (like bindweed or quackgrass) as completely as possible.
- Improve the soil (optional but recommended).
- Loosen compacted soil with a fork or tiller to a few inches. Add compost or slow-release fertilizer and mix lightly. This helps plant roots and improves long-term soil health.
- Grade and shape.
- Smooth the surface and create a slight slope away from foundations for drainage. Use a rake to level the bed.
Step-by-Step: Install Weed Barrier Fabric
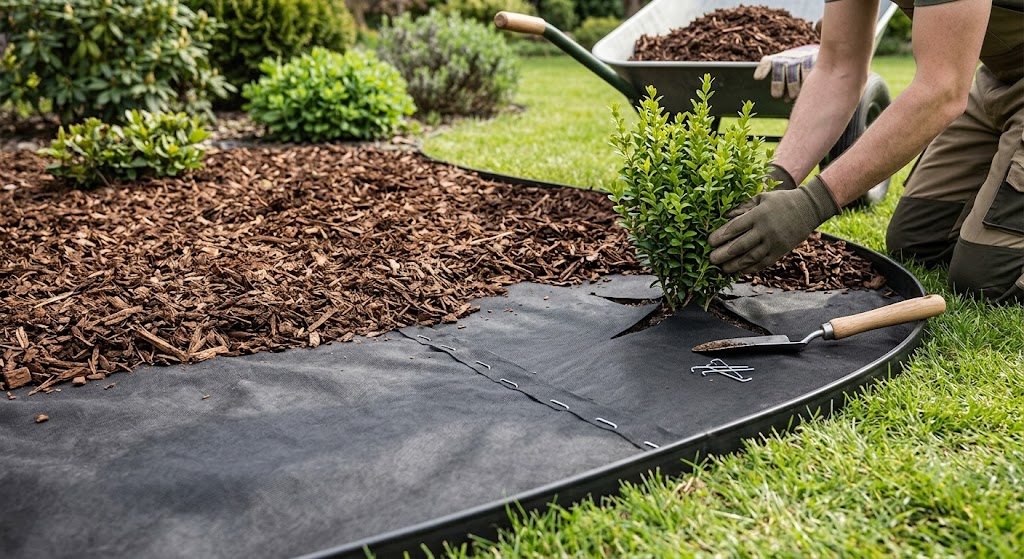
Tip: If you’re installing fabric around existing plants, cut the fabric into petals or an X and fold back to expose the plant base; then tuck fabric around stems.
- Lay the fabric.
- Roll out the fabric along the longest run. Keep the fabric taut but not stretched. Overlap seams by 6–12 inches to prevent weeds from sneaking through.
- Cut openings for plants.
- For new plantings, cut an X or circle where each plant will go. For established plants, cut a slit and fold fabric back to work around the stem.
- Anchor the fabric.
- Secure edges and overlaps with landscape staples every 12–18 inches and at all seams. Use extra staples at corners and around plant openings.
- Trim excess.
- Cut away surplus fabric at edges and where it would interfere with edging or walkways.
Step-by-Step: Edge and Anchor
- Install edging (optional).
- Edging keeps mulch contained and gives a clean look. Place edging on top of the fabric or just outside it, depending on the style.
- Secure fabric to edging.
- If the edging sits on top of the fabric, tuck the fabric under the edging and pin it down. If edging is outside the fabric, ensure the fabric edge is pinned and trimmed neatly.
Advertisement
Step-by-Step: Lay the Mulch
- Apply mulch evenly.
- Spread mulch to the recommended depth: 2–4 inches for most wood mulches. Keep mulch 2–3 inches away from plant stems and tree trunks to prevent rot and pest problems.
- Feather the edges.
- Slope mulch slightly toward the bed center so it doesn’t spill onto paths. Use a rake to smooth and even the surface.
- Avoid over-mulching.
- Too much mulch suffocates roots and can trap moisture against stems. If you’re topping up an existing bed, remove old compacted mulch before adding new.
Final Checks and Maintenance
- Water through the mulch after installation to settle it and help fabric conform to the soil.
- Inspect annually: pull back mulch to check for weeds that may have grown through seams or from the edges. Replace or reposition staples if fabric shifts.
- Top up mulch every 1–2 years as it decomposes; remove a thin layer of old mulch if it’s compacted before adding new.
- When to remove fabric: If you decide to renovate the bed or plant deeply, remove the fabric and incorporate organic matter into the soil.
Common Mistakes to Avoid
Advertisement
- Using plastic sheeting instead of breathable fabric — it traps water and harms soil life.
- Laying fabric over living turf without removing roots — grass will grow through or around the fabric.
- Piling mulch against trunks or stems — leave a small bare ring to prevent rot.
- Overlapping too little — seams with insufficient overlap let weeds through.
Quick Troubleshooting
- Weeds still appear: Check seams and edges; pull weeds and add staples or extra overlap.
- Mulch smells sour: It’s likely too thick or waterlogged; remove some, let soil dry, and replace with fresh mulch.
- Fabric shifting: Add more staples and ensure edges are secured under edging or soil.
When to Skip Fabric and Alternatives
- Vegetable gardens and annual beds: Skip fabric; use frequent cultivation, thick compost mulch, or organic weed-control methods.
- No-dig beds: Use thick organic mulch (compost, leaf mold) and repeated mulching to suppress weeds without fabric.
- Solarization: For heavy weed problems, solarize the soil with clear plastic for several weeks before planting (seasonal and situational).
Final Thoughts
A well-installed weed barrier fabric plus the right mulch gives you a low-maintenance, attractive bed that supports plant health and reduces chores. Focus on good bed prep, breathable fabric, correct mulch depth, and yearly checks. With those basics, your beds will look better and require far less weeding.
VIDEO: Here is the video for your assistance. The creator is not my affiliate and hasn't compensated me for featuring the video.
Video 1:
Video 2:
Disclaimer, No Liability: The authors and publishers of this website are not professional contractors and assume no liability or responsibility for any injury, damage, or financial loss resulting from the use or misuse of the information provided herein. All DIY projects are undertaken entirely at your own risk.
Related Articles
Advertisement
How to Lay Mulch and Install Weed Barrier Fabric: Step-by-Step DIY Guide | Tricks and Tips for Life
Comments and Questions
Please log in to leave a comment or ask a question. Don't have an account? Register here.